Creating a Group
Groups are organized collections of Test-takers who take the same assessments throughout the duration of a course of study. Examples of a group include Laboratory Sections, Discussion Groups, or any cohort or subdivision of students assessed using the same examinations, test administrators, and grading criteria as others within their group. Since a group is made up of individual test-takers, it is necessary to enter the metadata for each test-taker prior to assigning test-takers to groups.
Now, let’s walk through the steps of creating a group.
1. Click on the Groups icon in the Assessment Builder Bar.
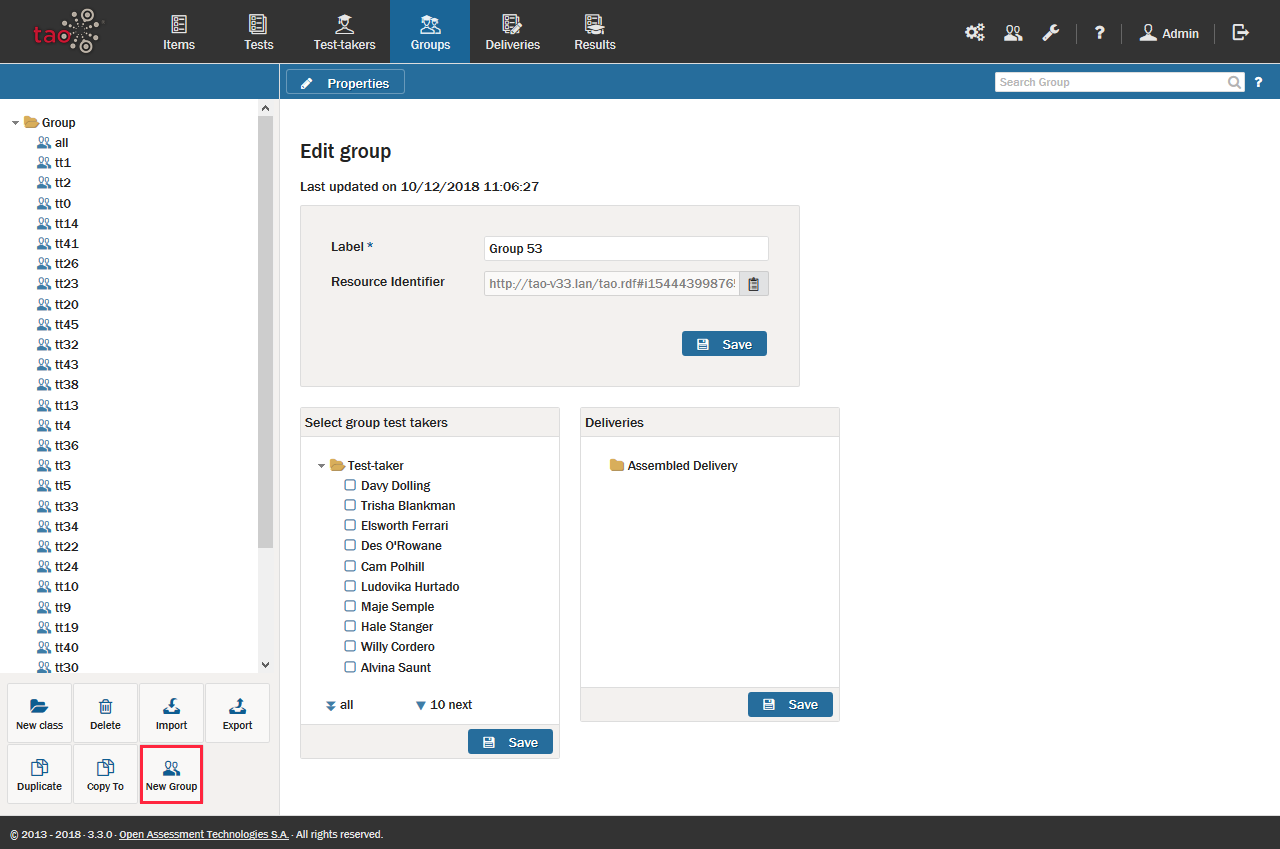
This will take you to the Groups page, and will show the last group which you, or the user before you, created. On the left-hand side of your screen you will see the Group Library of existing groups. The last group which was created will be highlighted in the library. In this tour, however, you will create a new group.

2. Click on the New Group icon in the button bank under the library to create a new group.
This brings up dialog box entitled Edit group for the newly created group. If desired, rename the group through the Label field, and then click the blue Save button.
Note: To create a new group in a different folder, select the desired folder in the library, and then click on the New Group icon in the button bank. To create a new folder (in TAO these represent new classes), click on New class in the button bank, and then give it a label. Highlight where to put the new folder relating to the new class. (Do not confuse Class with Group – ‘Class’ in this instance means a folder, while a ‘Group’ means a class, section, or any other cohort of students).
3. Populate the group.
To the right of the Edit group canvas are two other canvases: Select group test takers on the left, and Deliveries on the right. To select test-takers for your group, check the boxes by the relevant names in the left canvas, and then click the blue Save button. If a delivery has already been assembled for this group, it will appear in the list of deliveries in the right canvas. It should be selected before clicking the blue Save button.
