Exporting a Test
Tests may be assembled on almost any computer that has access to TAO. However, the capability to share tests will be useful in certain situations. For instance, a department may have standard performance expectations for its most basic courses, and these may be determined by a single test distributed to all the teachers of the department. Tests can be shared in a few easy steps.
1. Click on the Tests icon in the Assessment Builder Bar.
2. Select the class (Test folder) you want to export in the Test Library on the left-hand side, or click on New class in the button bank below the library. This will create a new folder for the tests you would like to export.
Creating a new class (i.e. a new folder) allows you to place tests in a distinct location in order to be transferred from one computer to another. When doing this, the test class can be renamed in the Edit test class dialog box in the field marked Label. Clicking the blue Save button will create the class.
Note: Individual tests can be exported without creating a new class to transfer to. It may be helpful, however, to organize the entire export from a single folder.
3. If you have created a new class for this purpose, move the tests you want to transfer to this new class in the Test library.
This selects the tests which are to be exported.
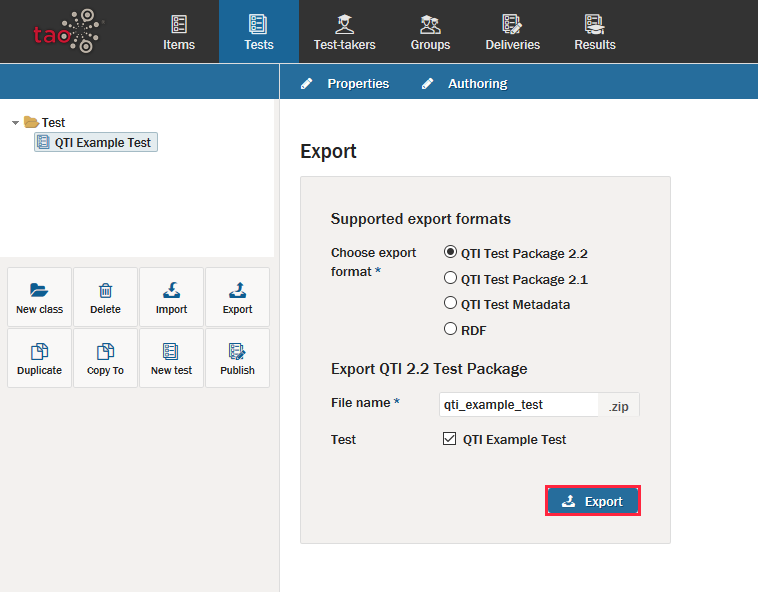
4. After clicking on the class, click Export in the button bank below the Library.
The dialog box will ask you to choose an export format: either QTI or RDF.
If the test is to be exported as a Question and Test Interoperability (.qti) formatted document, it will save the files as a compressed .zip file. Otherwise, the export will be in Resource Description Framework (.rdf) format.

5. Click the blue Export button in the dialog box to continue with the export.
6. Select the location to which you want to export your test, and then click Save.
The test can then be transferred either to a data storage device or a computer network. The next step in the transfer is to import the test onto the desired computer.
